

Photo by Roman Synkevych on Unsplash
Git Foundation
Beginner's Guide to Version Control Systems, Mastering Git .


The term "version control system" can be intimidating for beginners. Let`s simplify the definition by making the experience fun, understandable, and manageable.
This guide focuses on the basics of getting started with Git, then progresses to intermediate and advanced uses of Git.
Audience and scope
This guide is intended for
New web developers: Anyone new to software development and wants to learn more about version control systems and how to use Git effectively.
Software developers: Developers who have used other version control systems, or are new to version control and want to adopt Git as their primary VCS.
Technical writers: Technical writers who need to understand Git to effectively document the version control process.
project managers: Project managers who want to understand the basics of Git in order to supervise software development projects, collaborate effectively with developers, and track project progress.
Open Source Contributors: Anyone interested in contributing to open source projects and learning about Git, which is widely used in the open source community.
Students and Teachers: Anyone studying computer science, software engineering, or related fields, and educators who teach these subjects and want to integrate Git into their curriculum.
Freelancers and small teams: Independent developers or small teams who want to learn Git to better manage their code base, collaborate, and ensure version control best practices.
Table of contents
Background Introduction
What is a version control system?
What is the difference between centralized and distributed version control systems?
Get started
What is Git?
what are the basic uses of Git?
Why do developers use Git?
Practicals
Install Git on various operating systems
Set up your Git configuration
create a folder in git
Initialize the Git folder
stage the git folder
commit the git folder
Git branches
Git help
Background introduction.
Welcome to the fascinating world of version control! Let's embark on a journey to explore the concept and significance of version control systems, uncovering how they empower developers to collaborate seamlessly and keep track of changes in their codebase.
What is a version control system?
A version control system(VCS), is a software tool that helps track and manage changes to files and directories over time. It allows multiple users to collaborate on a project by tracking different file versions, easily identifying changes, and providing a mechanism to merge changes made by different users.
There are two main types of VCS
Centralized version control system
distributed version control system
What is the difference between centralized and distributed version control systems?
The difference between a centralized version control system and a distributed version control system is that in a centralized version control system, code is stored in a central repository.
A developer must check out a copy of the code, make changes, and then check the copy back into the central repository. This approach makes it easier to maintain code and track changes over time, but it can be a little harder to work offline and more difficult to collaborate with remote team members.
On the other hand, distributed version control systems allow a developer to maintain his local copy of the code on his local computer. Developers can make changes at any time and collaborate with other team members anywhere in the world.
Git, our main focus is a type of distributed version control system. Let's take a closer look at what this guide is about.
Get started
This guide would help you get started on the basics of Git, and brace up for an educative experience.
What is Git?
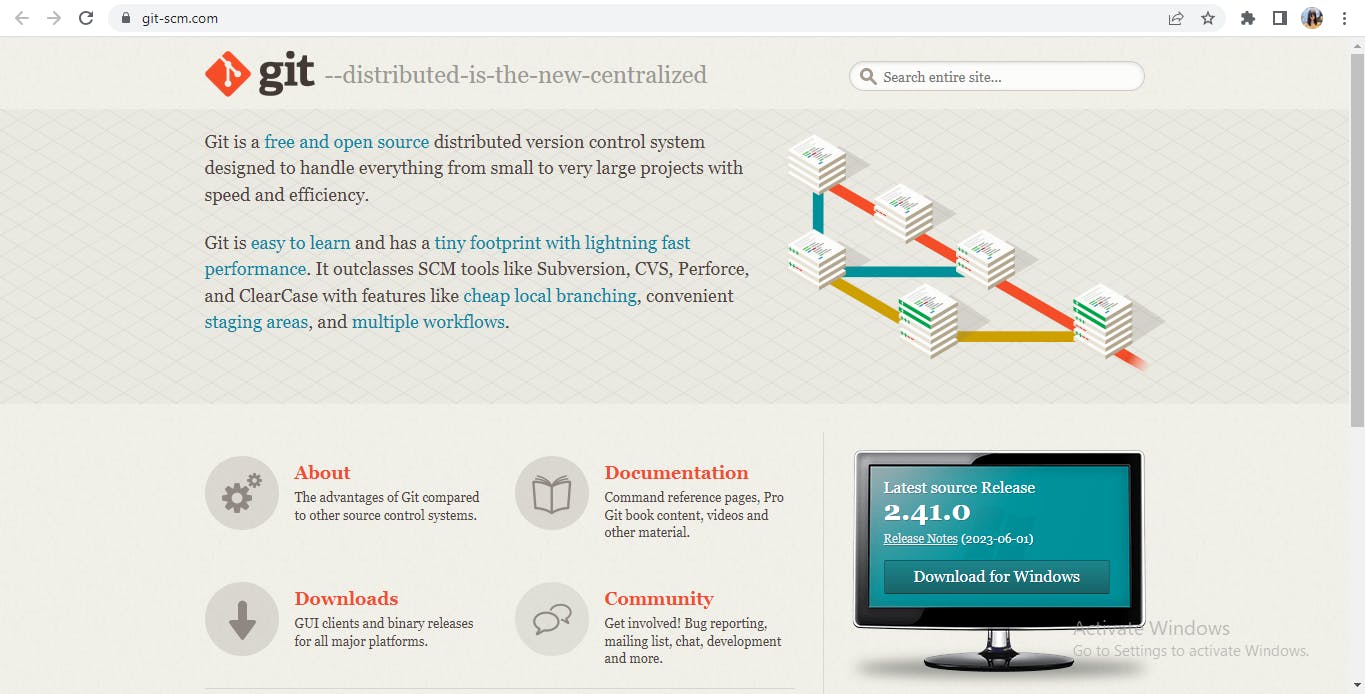
According to https://git-scm.com/
"Git is a free and open-source distributed version control system designed to handle everything from small to very large projects with speed and efficiency."
Git is released under the GNU General Public License Version 2 (GPLv2), a free and open-source software license.
This means that anyone can freely use, modify, and distribute Git, and access the source code to inspect and modify it.
Git is a popular version control system. Founded by Linus Torvalds in 2005 and maintained by Junio Hamano ever since.
what are the uses of Git?
Git is used
Track code changes
Track who made changes.
Encourage coding collaboration.
Why do developers use Git?
Techmonitor. ai says the total number of developers on GitHub now stands at more than 73 million, According to figures released in last year`s Octoverse report, this number will increase to 100 million by 2025.
Developers love Git because the source code is freely available to anyone, anywhere in the world. Without paying a dime, developers can collaborate from anywhere in the world. they can see the full history of the project. and also revert to the previous version of the project.
Practicals
Let us get started on the practicals and do-it-yourself aspect of this guide!
Git installation.
Git is available and can be installed on various operating systems such as Windows, macOS, and Linux.
To get started with Git, first, open a command shell.
For Windows, you can use Git Bash, which is included with Git for Windows. For Mac and Linux, you can use the built-in terminal.
The first thing we need to do is make sure Git is properly installed.
navigate to the command line. then Open the command prompt and type
git --version
If Git is installed properly, it displays the version like this

Git Setup and configuration
It`s a pre-requisite to let Git know who you are. Git uses information like your username and email address.
Change the username and e-mail to yours
git config --global user.name "kikile-rejoice"
git config --global user.email "rejoicekikile2@gmail.com"
Create a folder in git
we can create a new folder for the project or use an existing folder, let's start by using an existing folder.
Navigate to the existing folder on the command line or open it in File Explorer, right-click, and select "Git Bash Here".
alternatively, we can create a new directory in Git. In this instance the name of our new directory is myWork.
mkdir myWork
mkdir creates a new directory, to change the directory to the new directory created, we use the command cd[ name of new directory].
in this instance the name of our new directory is myWork.
cd myWork
cd changes the directory to the new directory.
Initialize the Git folder
After creating and navigating to a new directory, Git can be initialized on the new directory.
Initialize git by typing this command.
git init
This is the expected output

After initializing the new directory Git creates hidden folders to track changes.
Congratulation. You have created your first local Git repository. However, as you can see from above, it's empty.
We need to add a new file for this guide. Now let's create a new file. You can use your favorite text editor. Then save or move it to the folder you created.
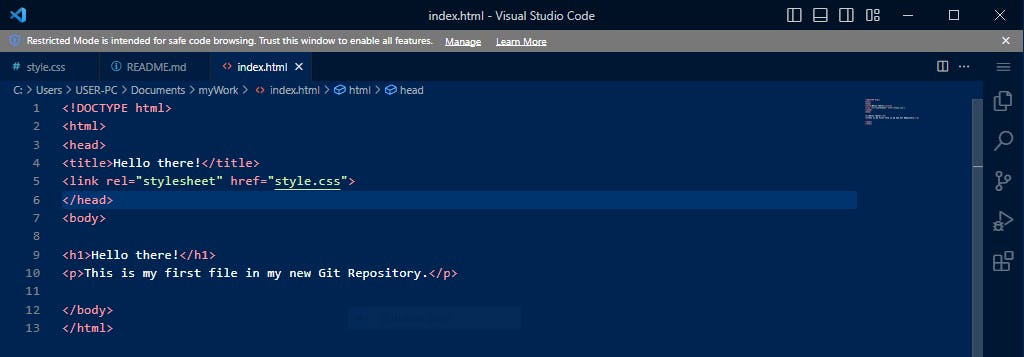
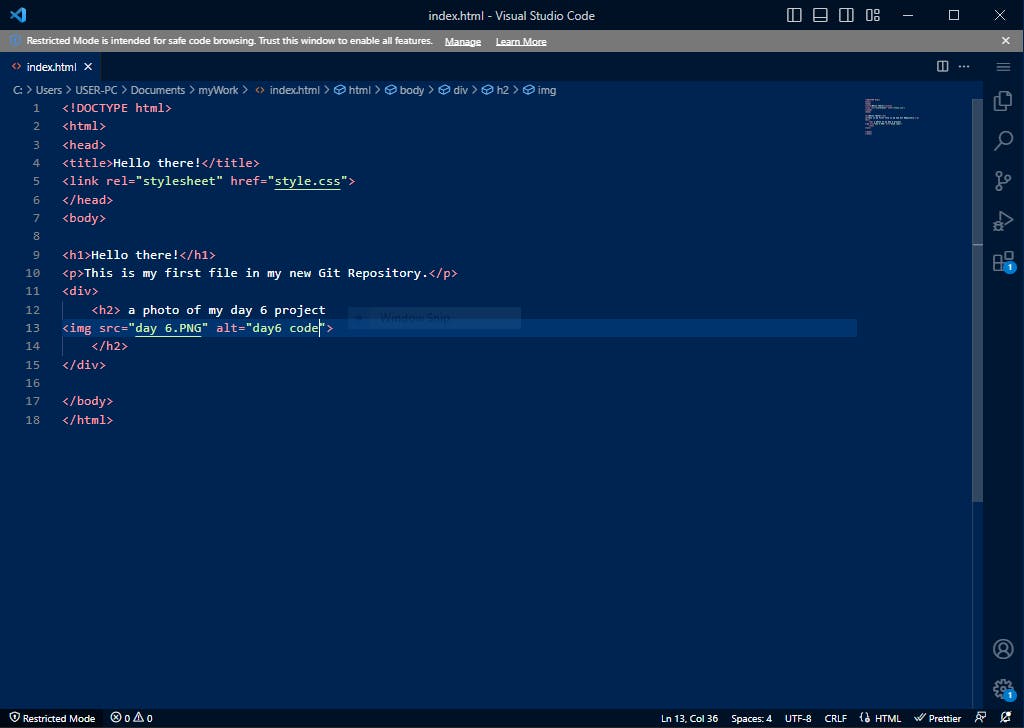
For this example, I am using visual studio code to create a simple HTML file like this:
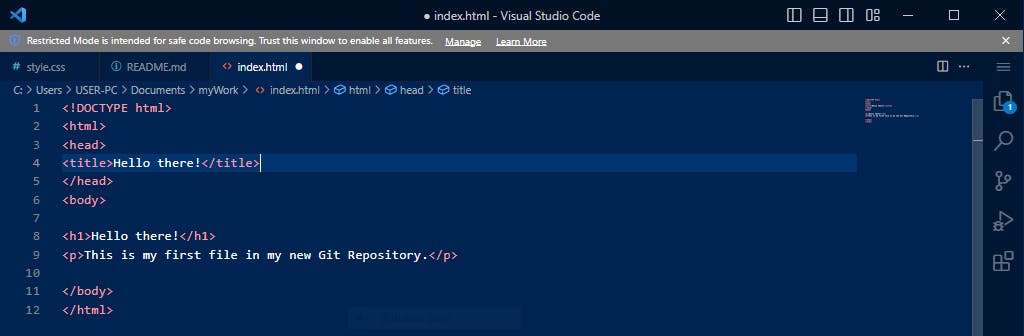
After creating the HTML file, save it as index.html in your new folder.
In Terminal, list the files in your current working directory.
To list the files in the repository you are currently working on, run the following command:
ls
This is the expected output
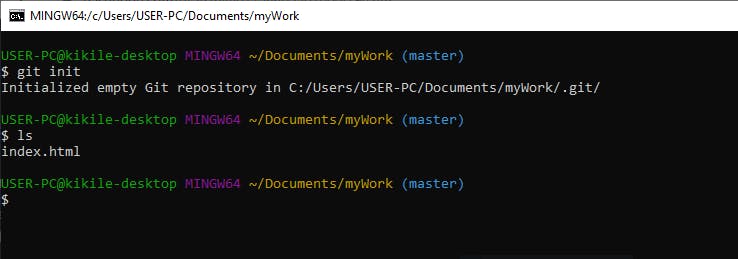
The ls command lists files in your current directory. You can see that there is Index.html file in the directory.
Git stage
In Git, a staging environment is an intermediate area where changes can be prepared and organized before being committed to the repository.
It acts as an intermediary between your working directory (where you make changes to your files) and the final commit, which is a permanent snapshot of your project.
Some major or minor changes occur as the workflow increases during the work process.
Changes such as adding, removing, or modifying files. As milestones are reached or parts of the project are completed.
To add files to the staging environment, use the following command prompt:
git add [file name]
After adding the file to the staging environment, we go ahead to commit the file.
Alternatively, if you want to add multiple files to the staging area at once, you can use some Git commands.
Let's create two more files, a stye.css file for formatting the HTML code first.
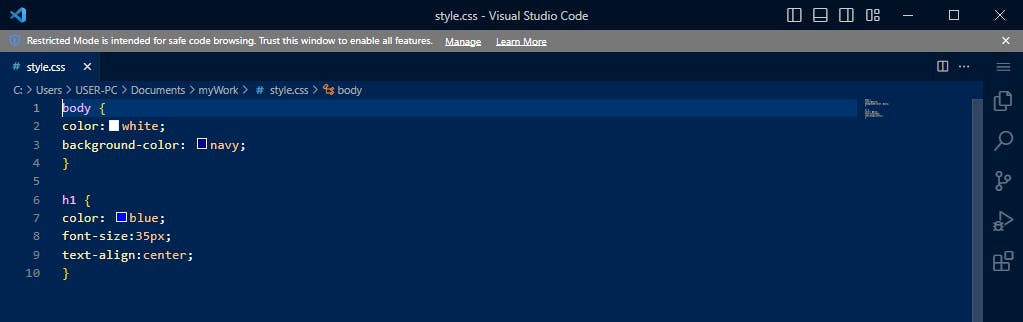
And then a README.md file describing the repository. A README.md is very important and recommended for any repository.
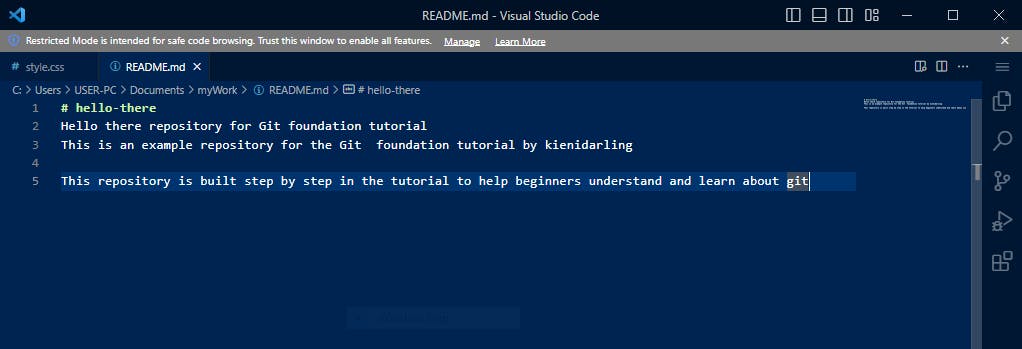
Before continuing, let's make some additions to our existing index.html file by linking our CSS file.
Several commands are available to add multiple files to the staging environment.
Now to add multiple files to the staging environment, use the following command prompt:
git add --all
git add *
git add .
No matter which command we choose to use, we get the same result.
In this tutorial, we would use the git add. command prompt.
Next, we would check the repository status to make sure the files in the repository have been added to the staging environment.
To check the status of the file, use the following command prompt:
git status
Let's take a look at the command line and try to implement everything we've discussed so far
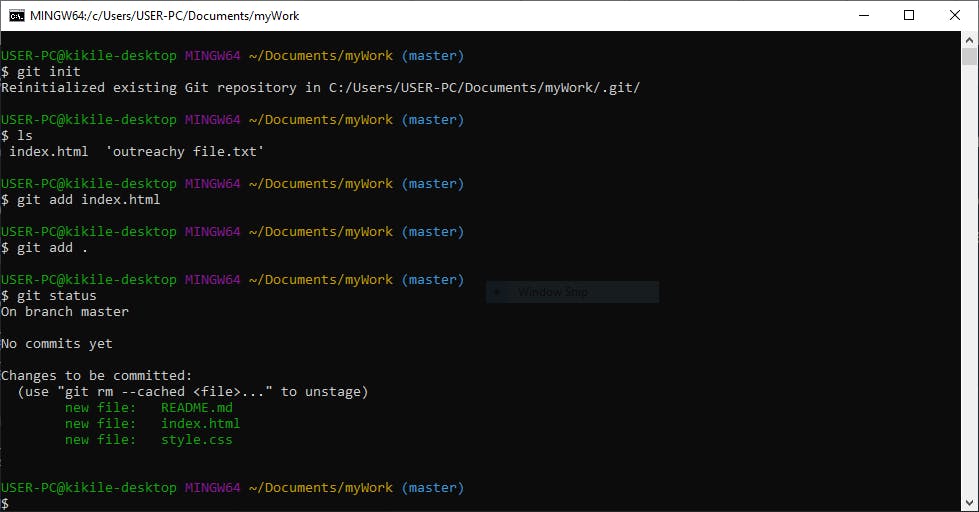
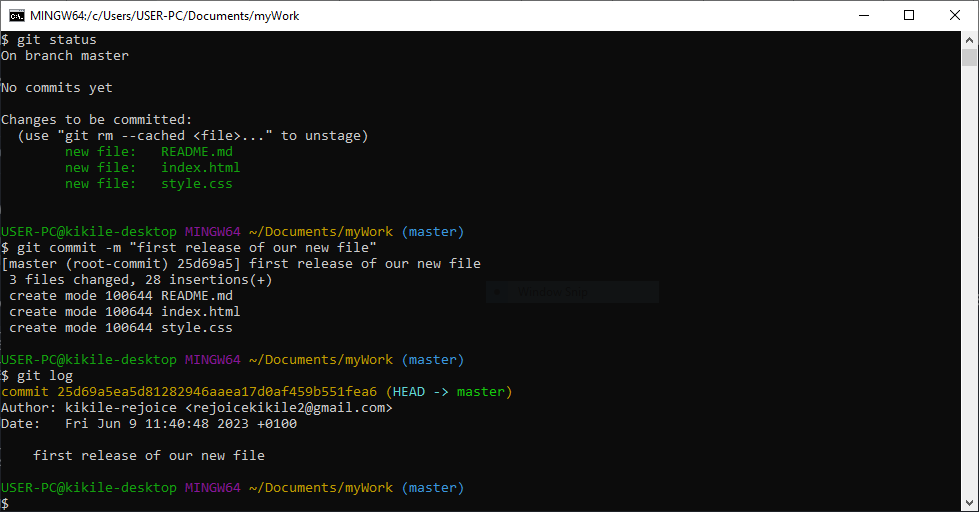
As you can see above, all three files have been added to the staging environment and are ready for the first commit.
Git commit
A commit records changes made to one or more files and includes a unique identifier, a commit message, and a reference to the parent commit.
A commit message is a brief description that describes the purpose or nature of the changes made in the commit. This provides context for others (and yourself) to review the "commit" later.
To make a commit, use the following command prompt:
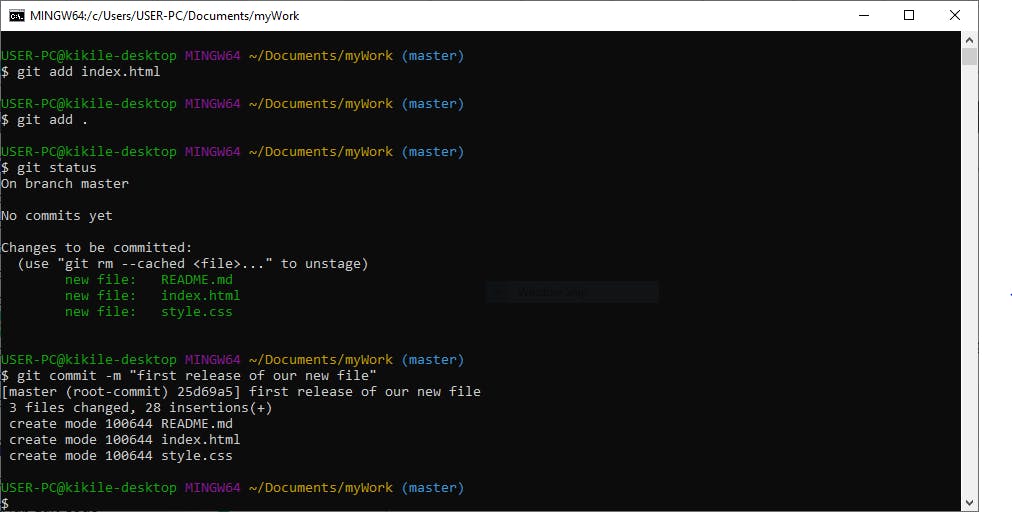
git commit -m ["message"]
Let`s go back to the command line and implement this command.
To view the commit history of our repository, use the following command prompt:
git log
After typing in the log command prompt, this is the expected output

The git log command prompt is a powerful Git tool that you can use to view your repository's commit history, Shows a summary of commits made within the project, including information such as commit hash, author, date, and commit message.
Git branches
In Git, a branch is a new/different version of the main repository.
Let's say you have a large project and you need to update its layout. Branches allow you to work on different parts of your project without affecting the main project.
After the work is done, you can include the branch in your main project. You can even switch between branches and work on different projects without disturbing each other. Branching in Git is very easy and fast.
Let's create a new branch called "images" and add an image to our index.html file.
git branch [name]
In this tutorial, this is the code snippet
git branch images
After creating a new branch, let's check the list of branches. Use the following command prompt:
git branch
After typing in the branch command prompt, this is the expected output
this is the expected output

You'll see a new branch called "images", but the * next to "master" indicates that you're now on the main branch. Use the command prompt to navigate to the newly created branch.
git checkout images
In order to switch between branches, The checkout prompt is used. You can easily switch from the main branch to the branch you want to work on.
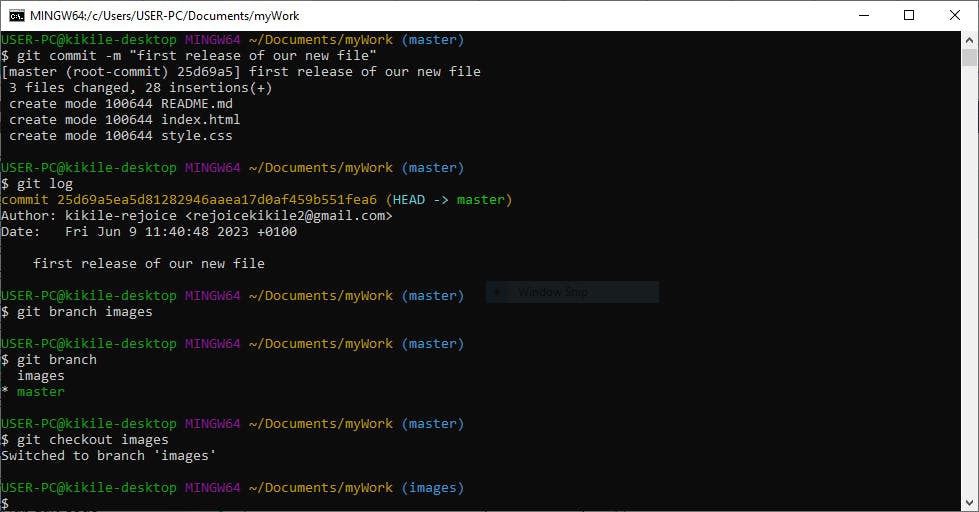
we moved our current workspace from the main branch to a new branch.
Open your favorite editor and make some changes to the index.html file.
For this tutorial, we will add an image to our working folder and add a line of code to the index.html file.
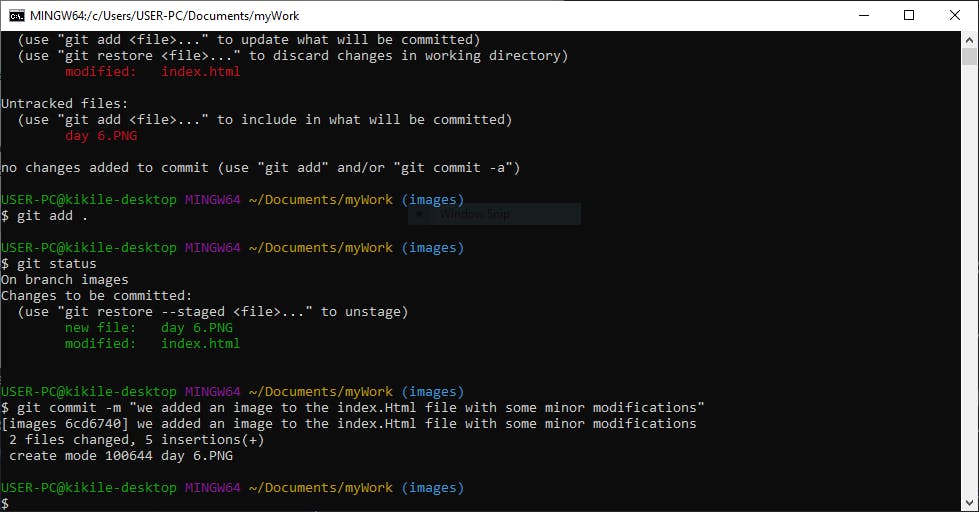
we have made some changes to the file and added a new file in the working directory (the same directory as the main branch).
after the changes have been made, let us check the status of our current branch.

Let us see what is going on here:
There are minor changes in Index.html, but the files have not been staged for commit. day6.PNG is not tracked Therefore, both files should be added to the staging environment for this branch.
After adding both files with the git add. command prompt Let's check the status of the file, using the git status command prompt: Then we can proceed to commit those changes
Branch Merge
Now that we have added an image, the images branch is ready, let's merge the master branch and the images branch.
First, you need to switch to the main branch which is the master branch.
To switch to the main branch of our repository, use the following command prompt:
git checkout master
After inputting the checkout command prompt to switch branches. we have to merge the current branch (master) with the images branch
To merge the images branch to the main branch of our repository, use the following command prompt:
git merge images
Let's take a look at the command line and try to implement everything we've discussed so far
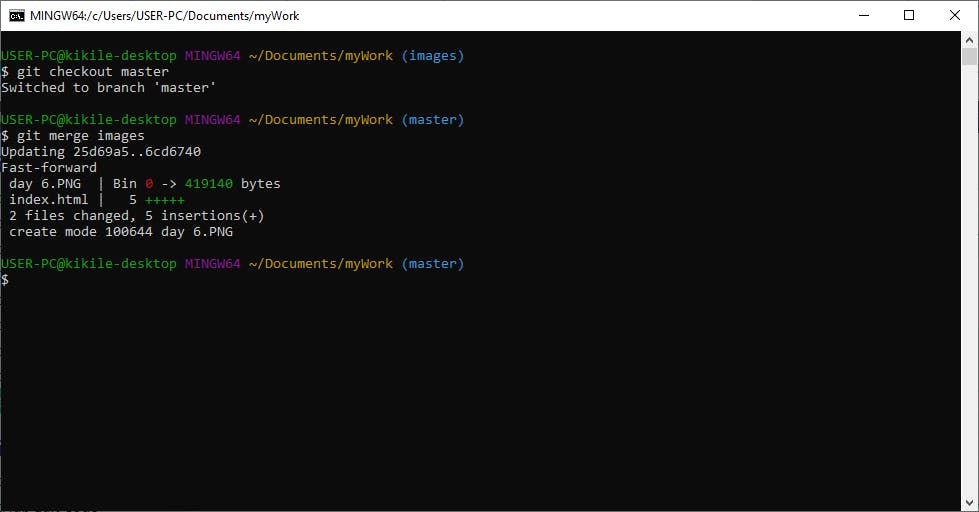
If you view the Index.html file, you'll see that the master and Images branches are basically the same. You can delete the image branch. The work is completed there and is no longer needed.
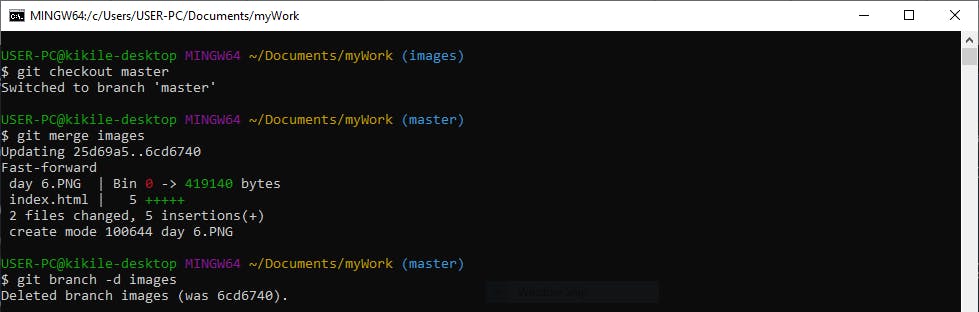
To delete the images branch of our repository, use the following command prompt:
git branch -d images
Let us go ahead to effect these changes;
Git help
Git commands are huge, too many to list, and can be difficult for humans to memorize and remember.
If you have trouble remembering commands or command options, you can use Git help.
There are several ways to use the help command on the command line.
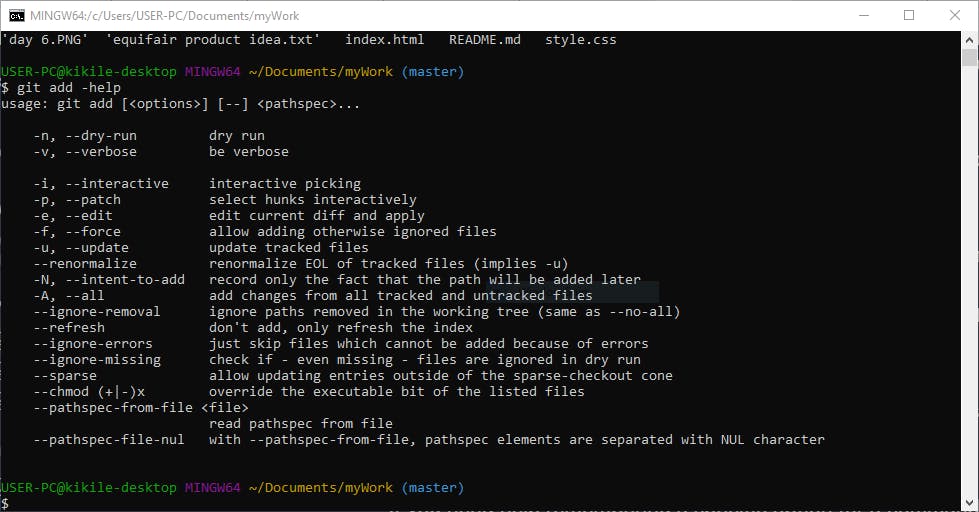
git command -help: this command prompt shows all available options for the given command
git command -help
For this guide, we would explore the options available for the git add command prompt
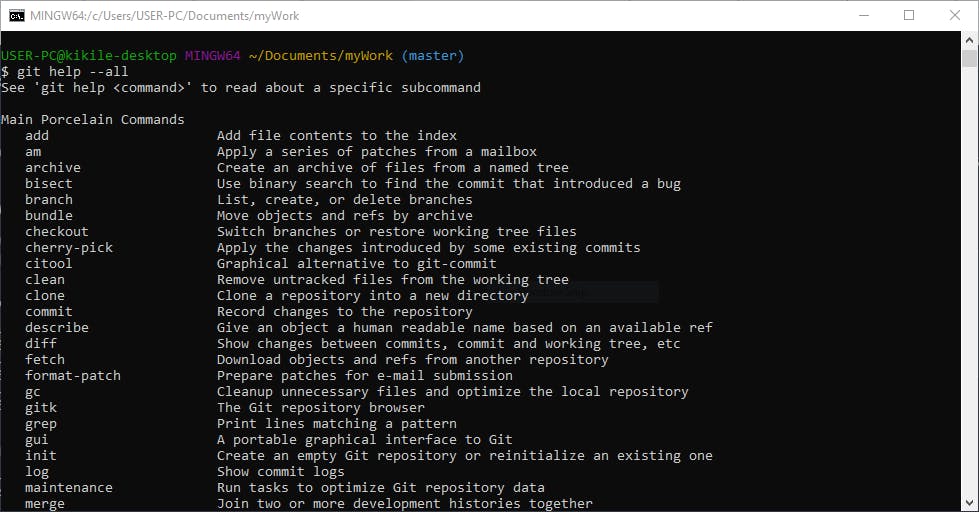
git help --all: this command prompt show all available commands Let's look at various commands.
git help --all
this is the expected output
If you need help remembering a specific option for a command, you can use git command -help.
Conclusion
Finally, congratulations on your first steps into the world of Git! You have embarked on an exciting journey of strengthening yourself as a developer and improving your collaboration skills.
Git can feel overwhelming at first, but with practice and an inquisitive mind, you'll quickly gain confidence.
For further learning, I recommend reading the following articles, They helped me understand Git.
The next articles on our learning journey. "Git Foundation: Advanced uses of Git" This article will introduce you to Git remote repository, explain how to collaborate with other developers and deepen your knowledge by exploring concepts such as push, pull, and conflict resolution in a team environment. This is an essential skill to master when working on collaborative software development.